Updated to the latest version of RPG Maker MV.
I wonder if this will be the final significant update to the engine?
Development blog for multiple RPG Maker video game projects
Updated to the latest version of RPG Maker MV.
I wonder if this will be the final significant update to the engine?
My strength is not writing, and definitely not long-form storytelling.
I’m a designer. I communicate meaning through imagery, motion, and composition.
With that in mind, I wonder if it would be better to have this project be entirely free of dialog. Cutscenes could play out with characters popping up a bubble over their heads with a symbol representing the topic of their thoughts, in the style of The Sims. I would also have to ensure the positioning, speed and style of movement of the characters is on-point, to help convey their personalities.
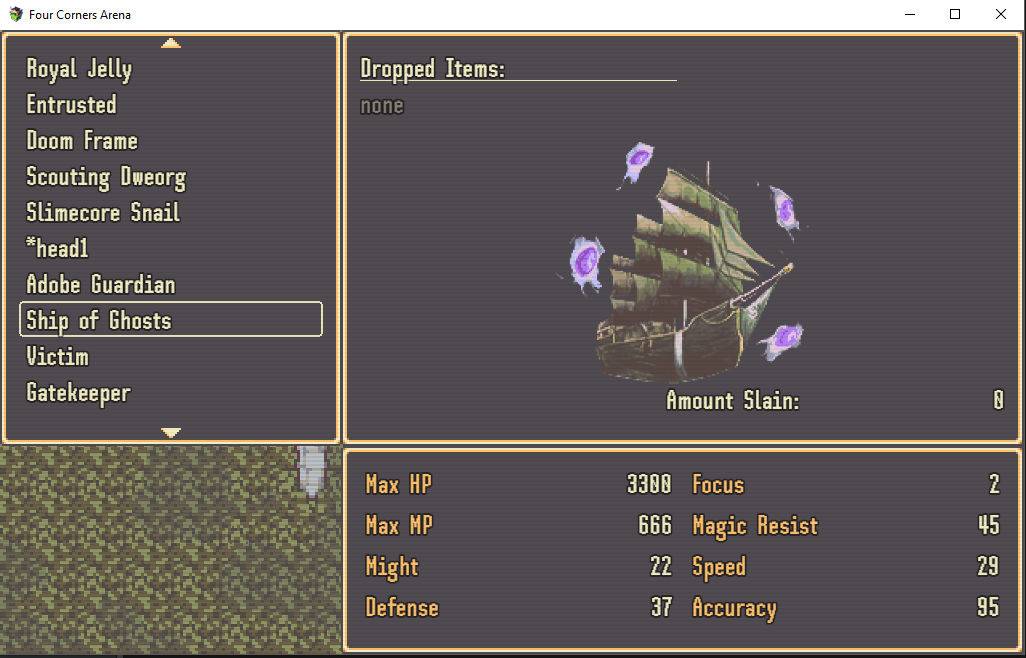
I’m planning to give players access to a bestiary that keeps track of the enemy monsters in the game.
Random mobs might have to be fought before they’re added to the bestiary. But I think it might be useful to add upcoming bosses to the bestiary before the player encounters them. This scheme will give players an optional heads-up of the next big foe and will let them prepare for it.
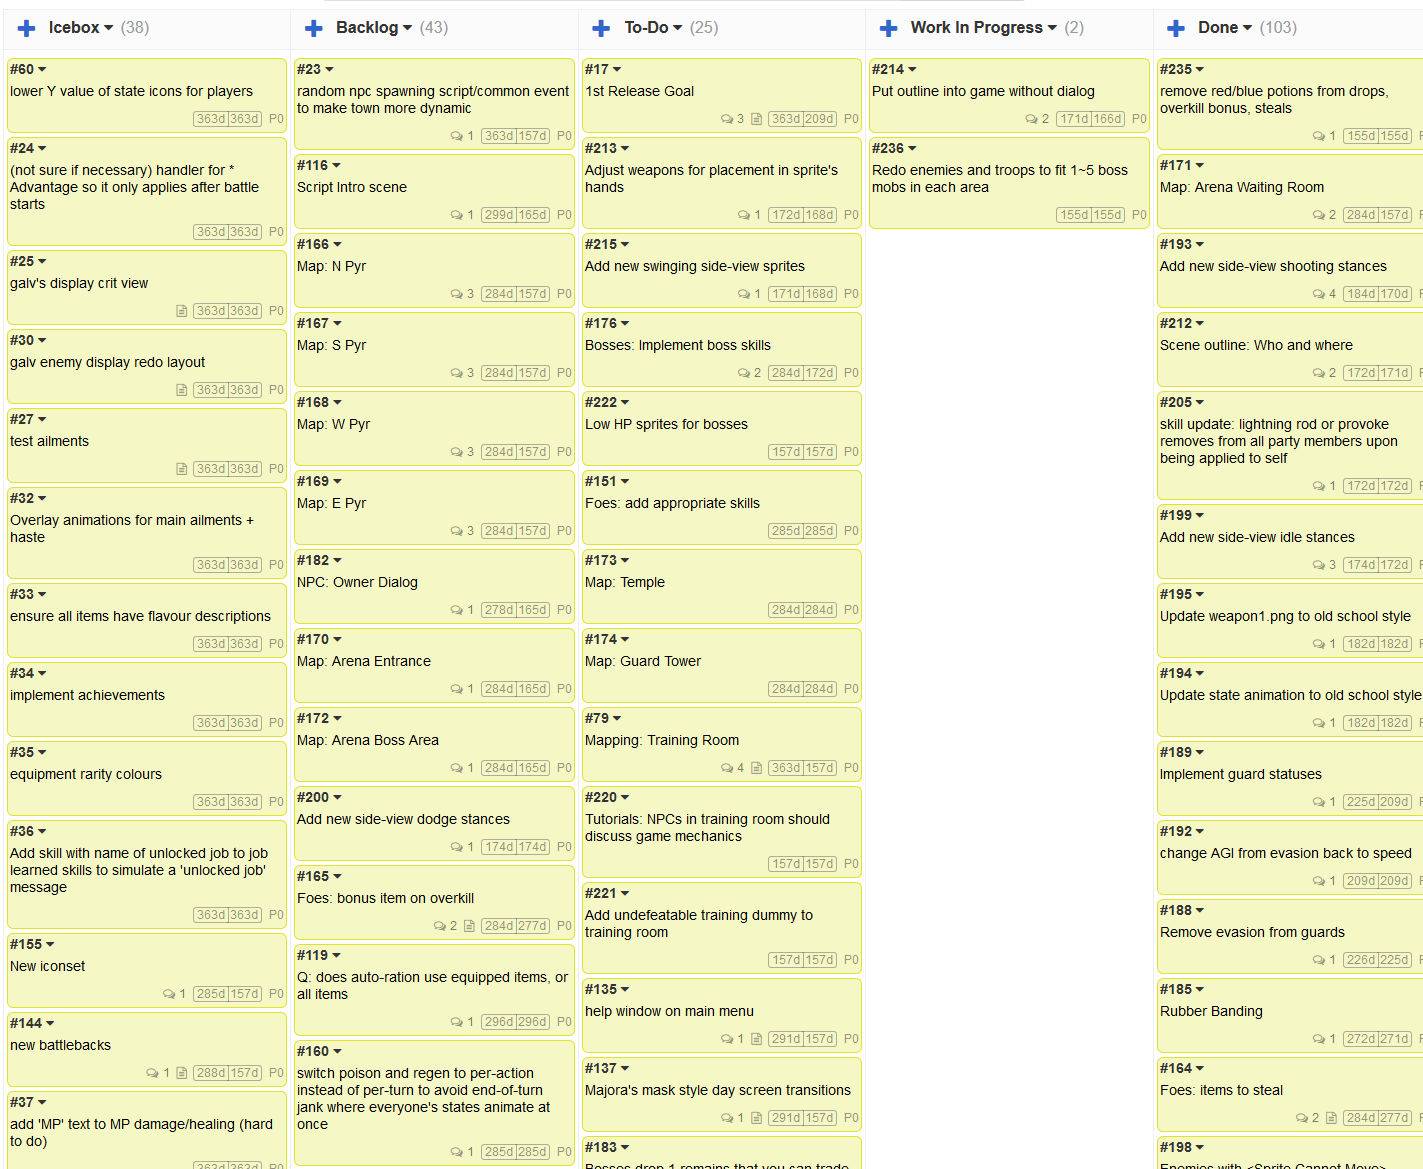
I’ve been using a Kanban-style board to keep track of tasks for the project. Having labels for each columns lets me prioritize tasks, and I like the kinetic feeling of dragging a task from one column to another.
But even with this system, my willpower sometimes slips, and I end up working on something fun and frivolous instead of the most practical task to actually get the project completed.
Playing with interface tweaks!

BEFORE:
AFTER:
SH Pinscher replaces Minecraftia as the game’s main font. This is mostly due to questions about Minecraftia’s legalities. But it also comes with much wider support for symbols (useful for arrows) and is generally more stylish.
There are multiple abilities in FCQ that rely on complex formulas. For example, Focus Strike is an ability that boosts your physical damage according to how much MP you have remaining.
While you could look at your remaining MP amount and try to calculate the resulting damage boost, that’s impractical. So I’ve started using state indicators to show the bonus damage as a percentage.
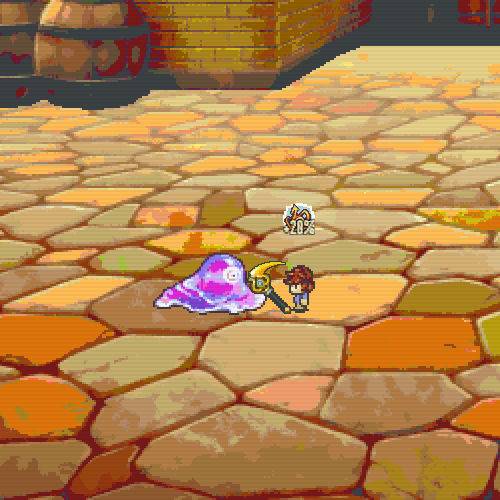
The icon art isn’t final, but it’s a good step in the right direction!
I’ve started publishing my RPG Maker MV plugins to Github under a permissive license!
I’ll be publishing them sporadically as I find time to clean up the code and make them presentable.
https://github.com/thinknathan/rpg-maker-mv-plugins
Check them out!
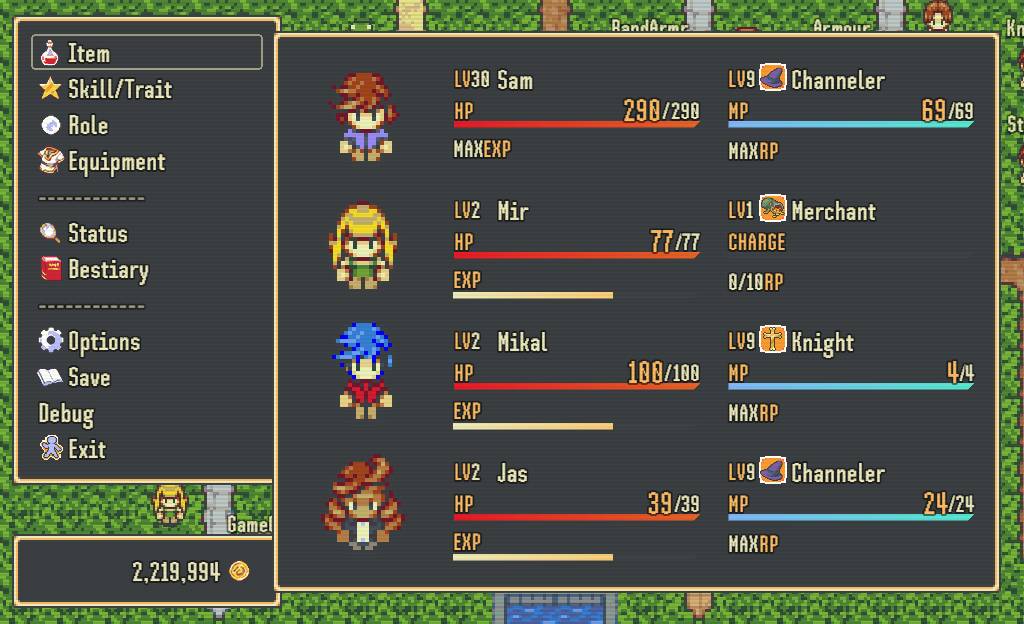
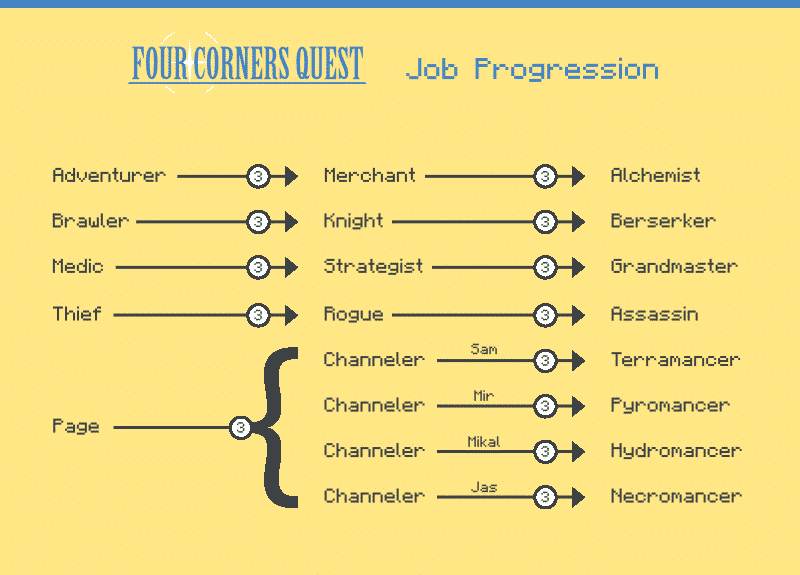
I got rid of the Hunter line and consolidated their most interesting skills into the other jobs. Here’s why…
I recently watched video gameplay of a MOBA, and I admired the well-defined roles of each character class. In that genre, the most common roles are DPS, Tank, and Support.
Single-player RPGs tend to allow more complexity in their character roles, perhaps because of their solo nature; with no team depending on you to play well, there is no urgency to understand each character.
In FCQ, each job has a unique theme. They broadly fall into the same categories mentioned above, but there are outliers.
As for the Hunter/Ranger/Sage line of jobs… I don’t know what describes them. Each had radically different abilities, with little to connect them. I liked the idea of a class focused on bows and traps, so the Hunter was one of my favourites thematically. But I was never satisfied with the other two classes, nor their tenuous connection to each other.
Hunter skills are now gone (sadly).
Page now has the buffs from the Ranger.
Grandmaster has weather-changing from Sage.
Pixels are cool if you’re a nerd.
I was using a plugin that created a pixelated effect on demand. But after updates to RPG Maker MV (and the Pixi library it’s based on), the plugin broke. When the original plugin writer updated the plugin, they removed the pixelate functionality altogether.
So I went on a search to bring back my crunchy pixels.
I discovered this wonderful library of filters for Pixi v4.
Once again, the pixelate functionality was broken. But Github user jeff-gold-marblemedia posted a quick fix.
Bringing that fix into the main code, and then pairing down the features I didn’t need, I ended up with a handy plugin.
/*:
* @plugindesc v1.0.6 Pixelate filter for Pixi v4.
* @author pixi-filters https://github.com/pixijs/pixi-filters
* @help
* pixi-filters https://github.com/pixijs/pixi-filters
* Developers can make use of the filter like so:
* var filter = new PIXI.filters.PixelateFilter();
* filter.pixelSize = 50;
*/

/*!
* pixi-filters - v1.0.6
* Compiled Wed Aug 31 2016 08:40:25 GMT-0400 (EDT)
*
* pixi-filters is licensed under the MIT License.
* http://www.opensource.org/licenses/mit-license
*/
(function(f){if(typeof exports==="object"&&typeof module!=="undefined"){module.exports=f()}else if(typeof define==="function"&&define.amd){define([],f)}else{var g;if(typeof window!=="undefined"){g=window}else if(typeof global!=="undefined"){g=global}else if(typeof self!=="undefined"){g=self}else{g=this}g.filters = f()}})(function(){var define,module,exports;return (function e(t,n,r){function s(o,u){if(!n[o]){if(!t[o]){var a=typeof require=="function"&&require;if(!u&&a)return a(o,!0);if(i)return i(o,!0);var f=new Error("Cannot find module '"+o+"'");throw f.code="MODULE_NOT_FOUND",f}var l=n[o]={exports:{}};t[o][0].call(l.exports,function(e){var n=t[o][1][e];return s(n?n:e)},l,l.exports,e,t,n,r)}return n[o].exports}var i=typeof require=="function"&&require;for(var o=0;o<r.length;o++)s(r[o]);return s})({8:[function(require,module,exports){ // @see https://github.com/substack/brfs/issues/25 /** * This filter applies a pixelate effect making display objects appear 'blocky'. * * @class * @extends PIXI.AbstractFilter * @memberof PIXI.filters */ function PixelateFilter() { PIXI.Filter.call(this, // vertex shader "#define GLSLIFY 1
attribute vec2 aVertexPosition;
attribute vec2 aTextureCoord;

uniform mat3 projectionMatrix;

varying vec2 vTextureCoord;

void main(void)
{
 gl_Position = vec4((projectionMatrix * vec3(aVertexPosition, 1.0)).xy, 0.0, 1.0);
 vTextureCoord = aTextureCoord;
}", // fragment shader "#define GLSLIFY 1
varying vec2 vTextureCoord;

uniform vec4 filterArea;
uniform float pixelSize;
uniform sampler2D uSampler;

vec2 mapCoord( vec2 coord )
{
 coord *= filterArea.xy;
 coord += filterArea.zw;

 return coord;
}

vec2 unmapCoord( vec2 coord )
{
 coord -= filterArea.zw;
 coord /= filterArea.xy;

 return coord;
}

vec2 pixelate(vec2 coord, vec2 size)
{
 return floor( coord / size ) * size;
}

vec2 getMod(vec2 coord, vec2 size)
{
 return mod( coord , size) / size;
}

float character(float n, vec2 p)
{
 p = floor(p*vec2(4.0, -4.0) + 2.5);
 if (clamp(p.x, 0.0, 4.0) == p.x && clamp(p.y, 0.0, 4.0) == p.y)
 {
 if (int(mod(n/exp2(p.x + 5.0*p.y), 2.0)) == 1) return 1.0;
 }
 return 0.0;
}

void main()
{
 vec2 coord = mapCoord(vTextureCoord);

 // get the rounded color..
 vec2 pixCoord = pixelate(coord, vec2(pixelSize));
 pixCoord = unmapCoord(pixCoord);

 vec4 color = texture2D(uSampler, pixCoord);

 // determine the character to use
 float gray = (color.r + color.g + color.b) / 3.0;

 float n = 65536.0; // .
 if (gray > 0.2) n = 65600.0; // :
 if (gray > 0.3) n = 332772.0; // *
 if (gray > 0.4) n = 15255086.0; // o
 if (gray > 0.5) n = 23385164.0; // &
 if (gray > 0.6) n = 15252014.0; // 8
 if (gray > 0.7) n = 13199452.0; // @
 if (gray > 0.8) n = 11512810.0; // #

 // get the mod..
 vec2 modd = getMod(coord, vec2(pixelSize));

 gl_FragColor = color;

}"
);
  this.pixelSize = 4;
}

PixelateFilter.prototype = Object.create(PIXI.Filter.prototype);
PixelateFilter.prototype.constructor = PixelateFilter;
module.exports = PixelateFilter;

Object.defineProperties(PixelateFilter.prototype, {
  /**
   * This a point that describes the size of the blocks.
   * x is the width of the block and y is the height.
   *
   * @member {PIXI.Point}
   * @memberof PIXI.filters.PixelateFilter#
   */
  pixelSize: {
    get: function () {
      return this.uniforms.pixelSize;
    },
    set: function (value) {
      this.uniforms.pixelSize = value;
    }
  }
});

},{}],16:[function(require,module,exports){
// Require built filters
var filters = {
  PixelateFilter: require('./pixelate/PixelateFilter')
};

// Assign to filters
Object.assign(PIXI.filters, filters);

// Export for requiring
if (typeof module !== 'undefined' & amp; & amp; module.exports) {
  module.exports = filters;
}
},{"./pixelate/PixelateFilter":8}]},{},[16])(16)
});
Chances are there’s a bit of vestigial nonsense near the end. My lack of familiarity with the way Pixi/Node works mean that I can’t optimize it much. But it’s working in all my use cases.
Toss this into a Scene_Map method to apply it. Putting it to good use is up to you.
this.pixelateFilter = new PIXI.filters.PixelateFilter();
this.pixelateFilter.pixelSize = 20;
this.children[0].filters = [this.pixelateFilter];